Scenes and UI
Create a Scene
1 Create a project and name it HelloCocos. Do the following:
Select File -> New Project -> Cocos Project, and click Next.
Name the project HelloCocos, and click Finish.
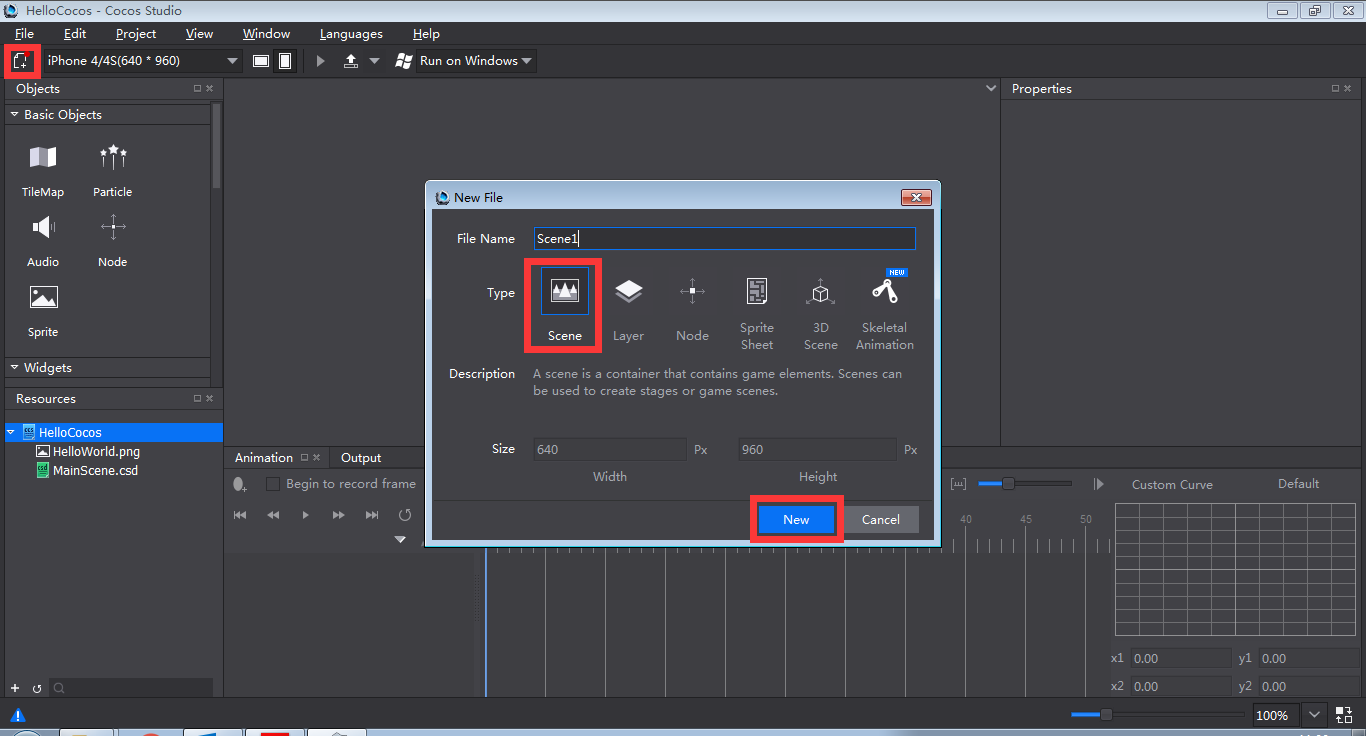
2 Create a scene and name it Scene1. Do the following:
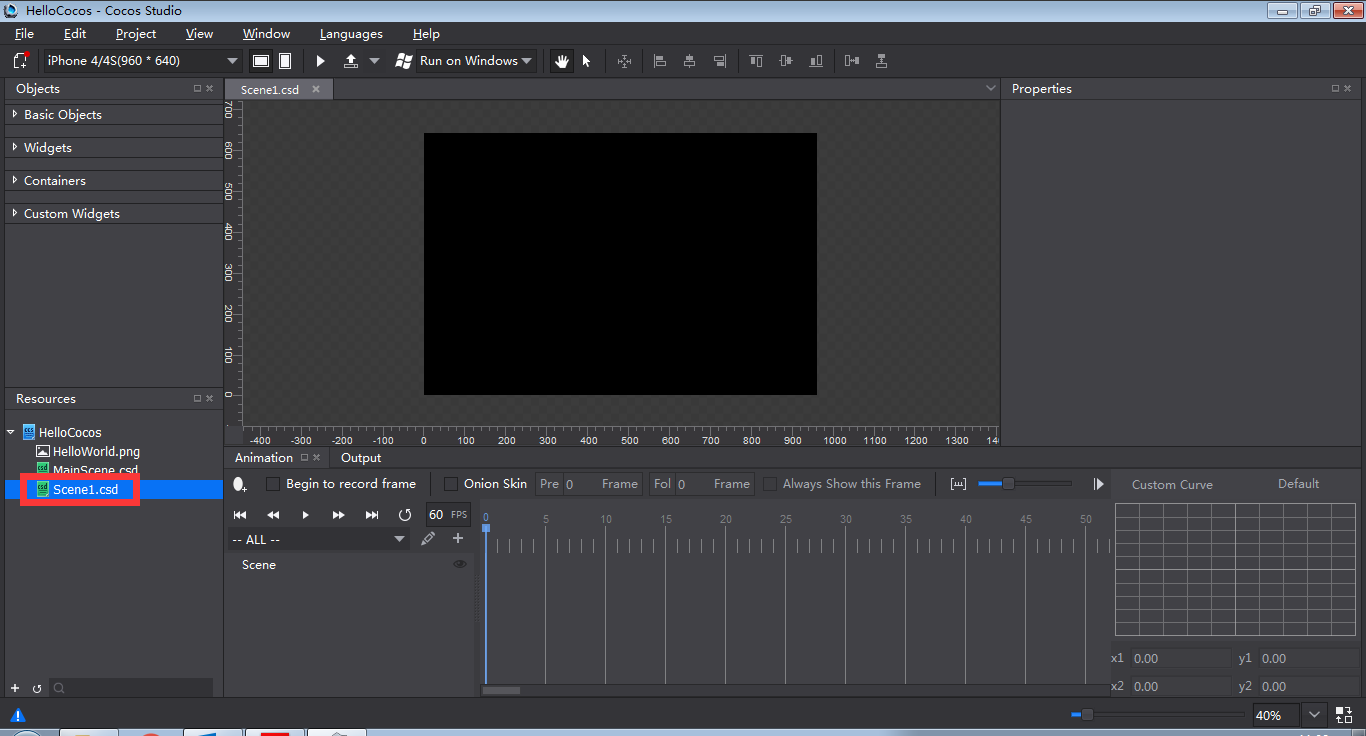
- Click New File button -> select Scene -> name the file Scene1 -> click New.
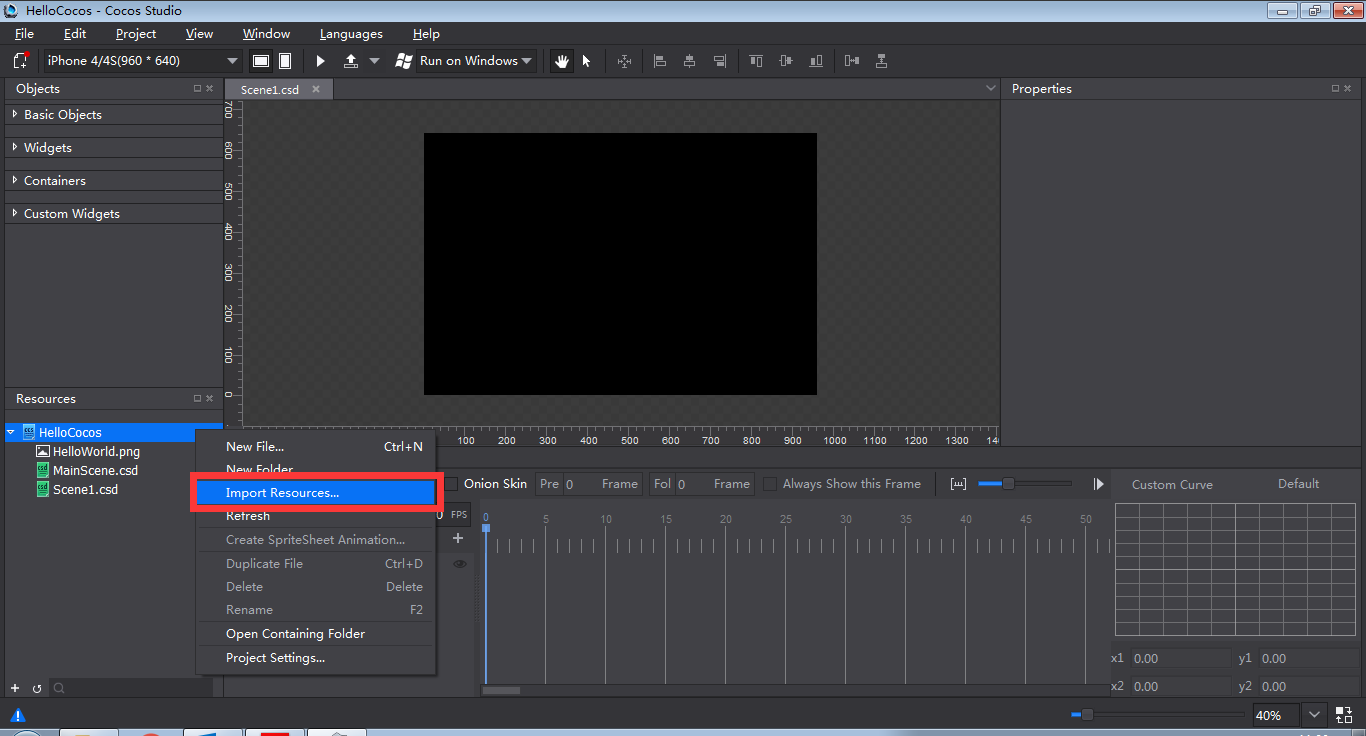
3 Right click on Resources panel, select Import Resources, and then select files to import.
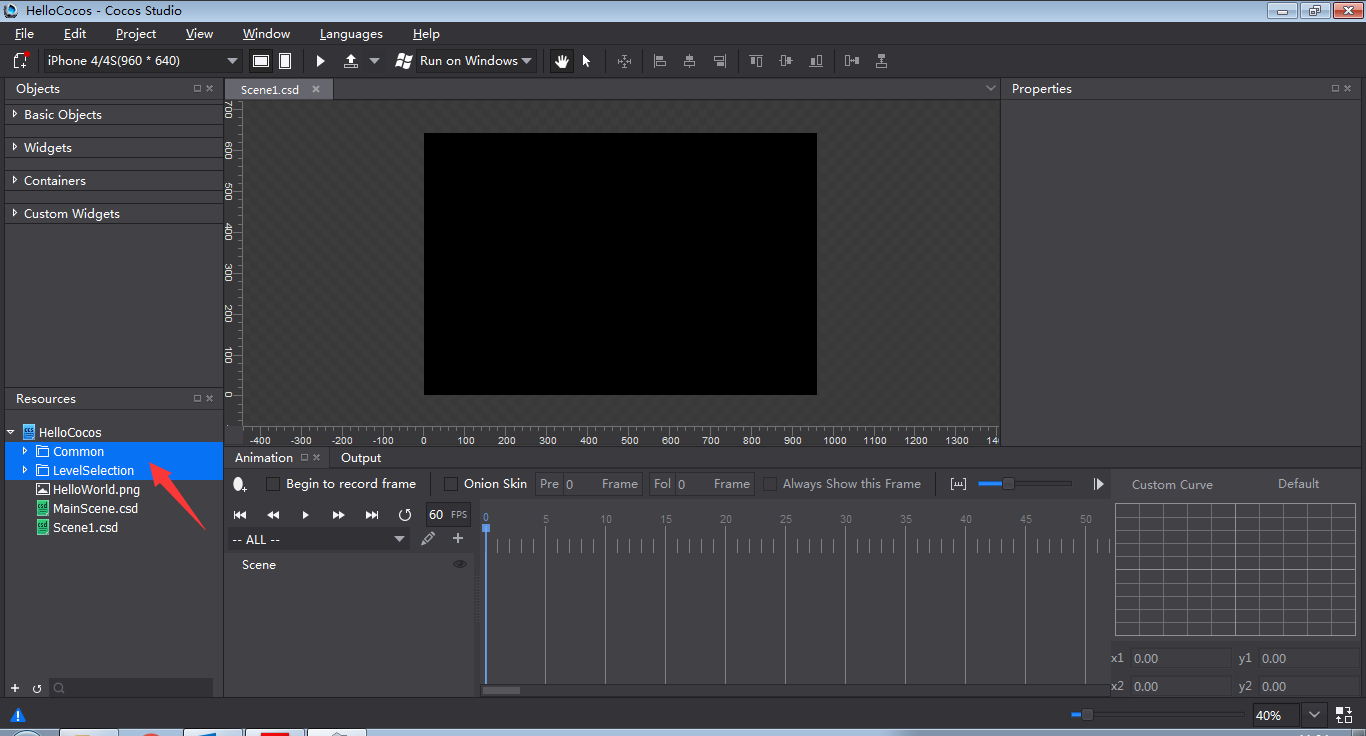
4 Import two resource folders: Common and LevelSelection.
5 Click Vertical Screen  to modify the screen resolution from the default setting 960 640 to 640 * 960.

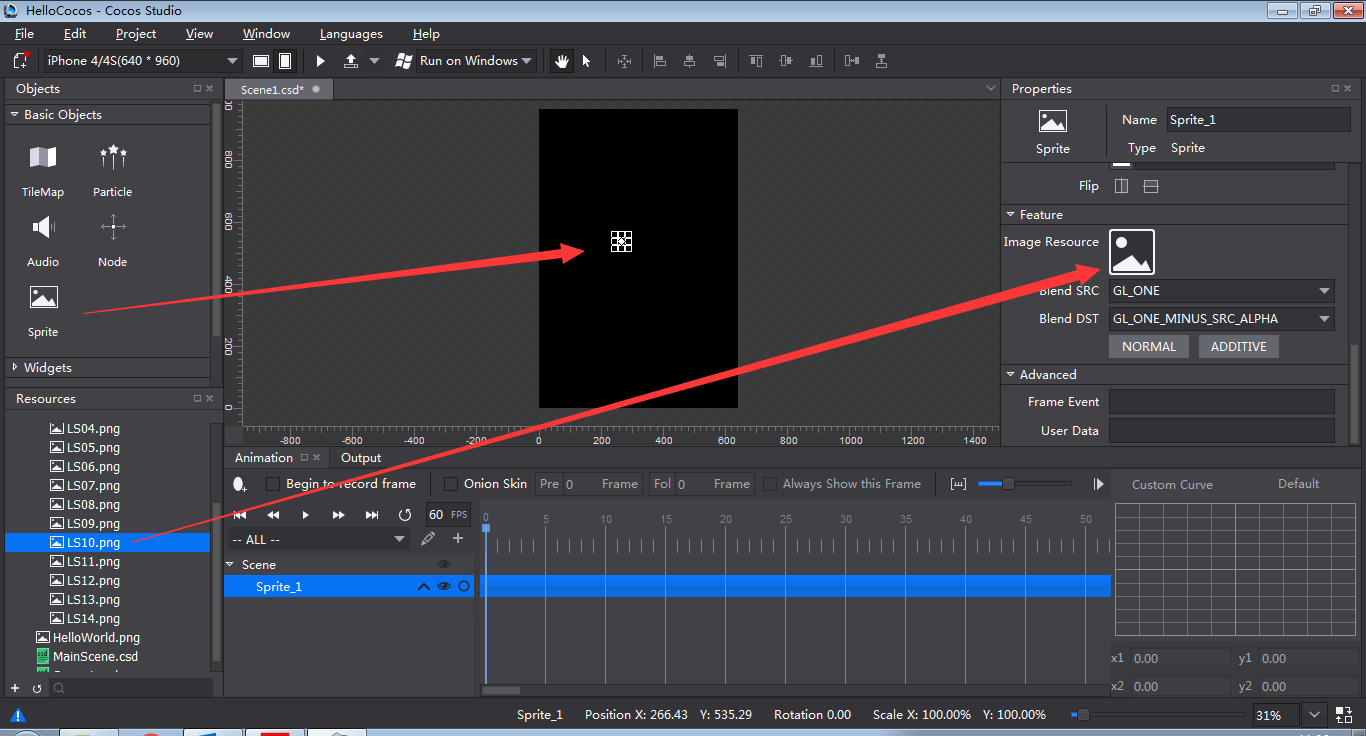
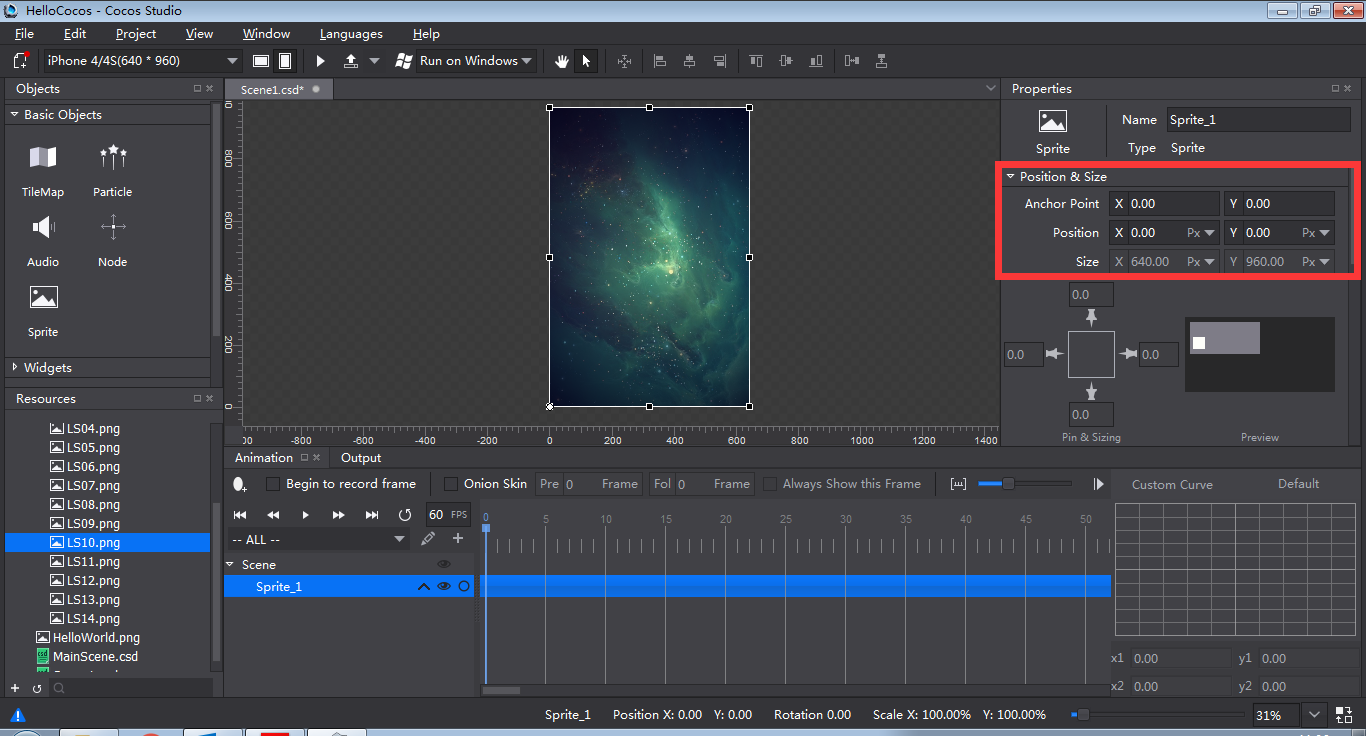
6 Drag and drop a Sprite from Basic Objects to Canvas; drag and drop LS10.png from Resources panel to Image Resource and modify its position as tile (640 * 960).
In Cocos Studio, the procedures of creating Scenes, UI and animations are similar.
Create a Layer
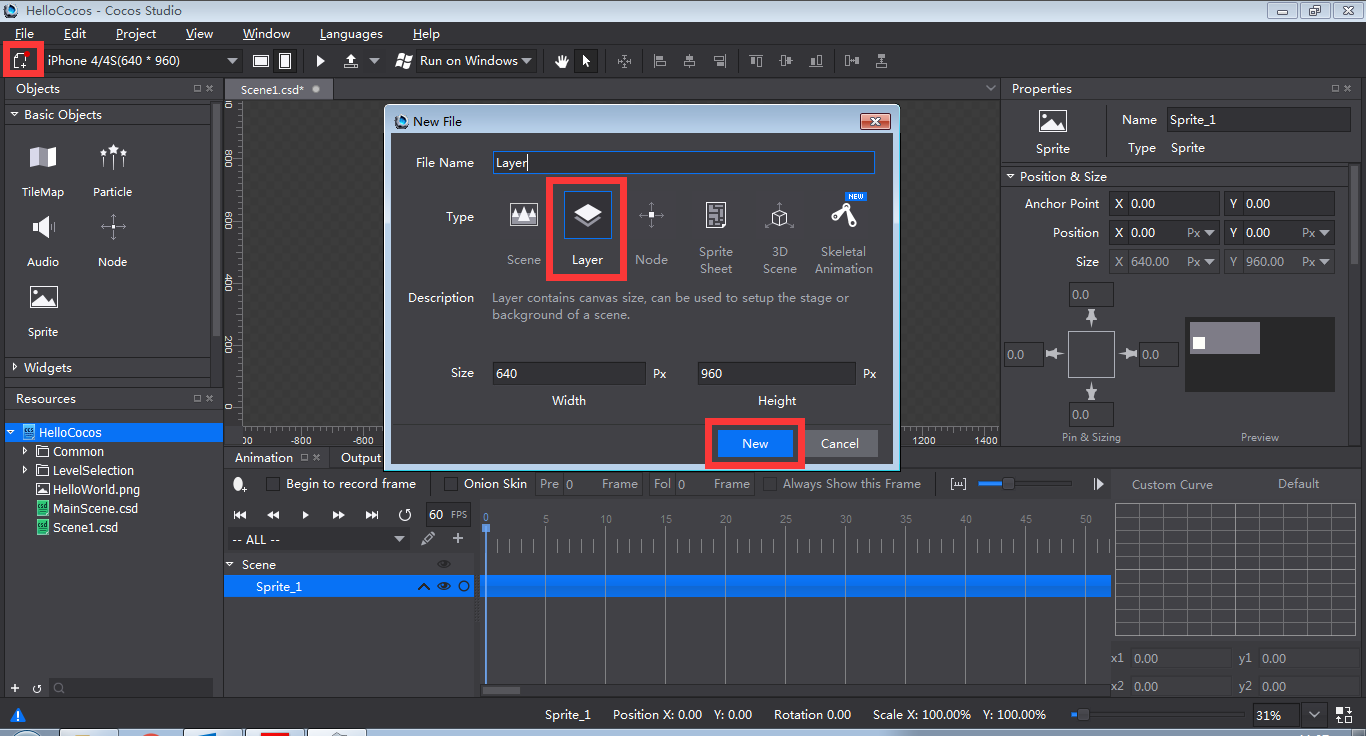
1 Click New File button and select Layer. Name it “Layer” and click New.
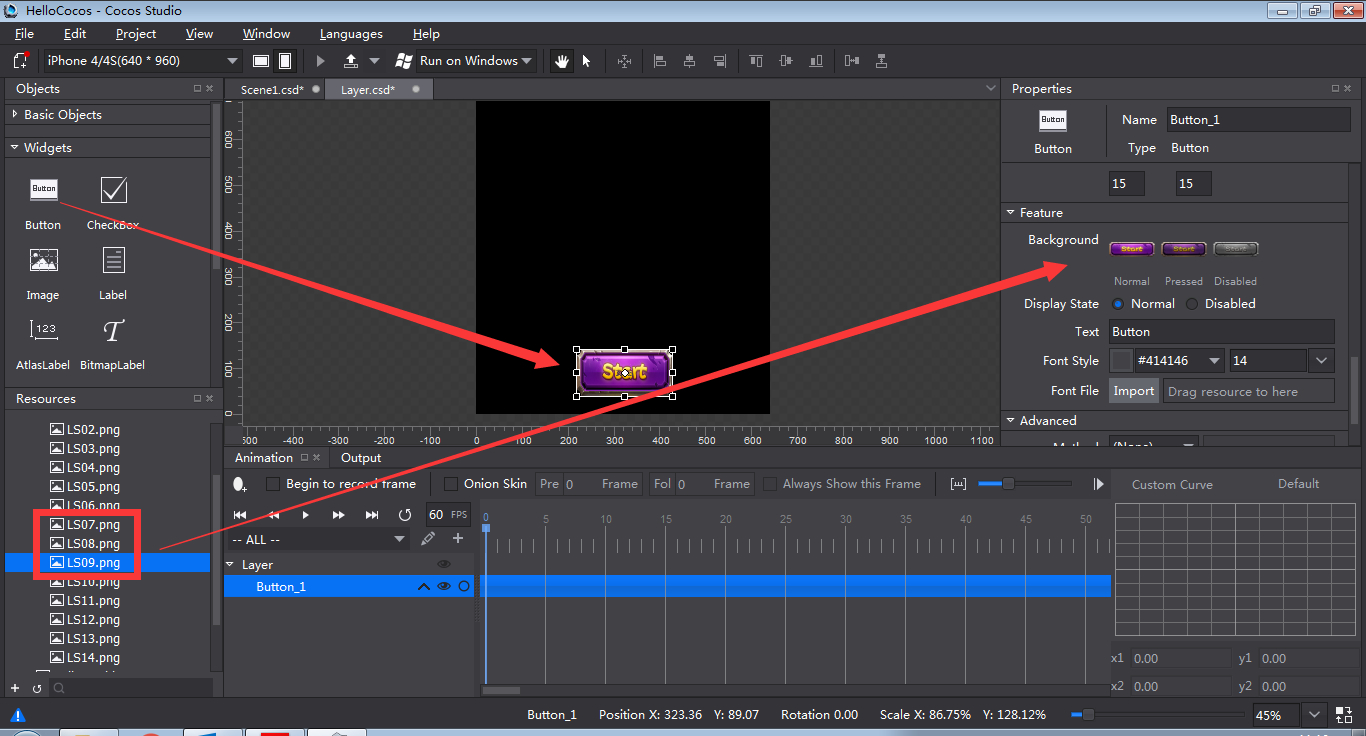
2 Drag and drop a Button to Canvas and specify its properties. Put it at center bottom of Canvas.
3 Add “Layer.csd” to “Scene1.csd”. Do the following:
Double click “Scene1.csd” in Resources panel to open it.
Drag and drop “Layer.csd” to the rendering section (The layer can be accessed from the Resources section).
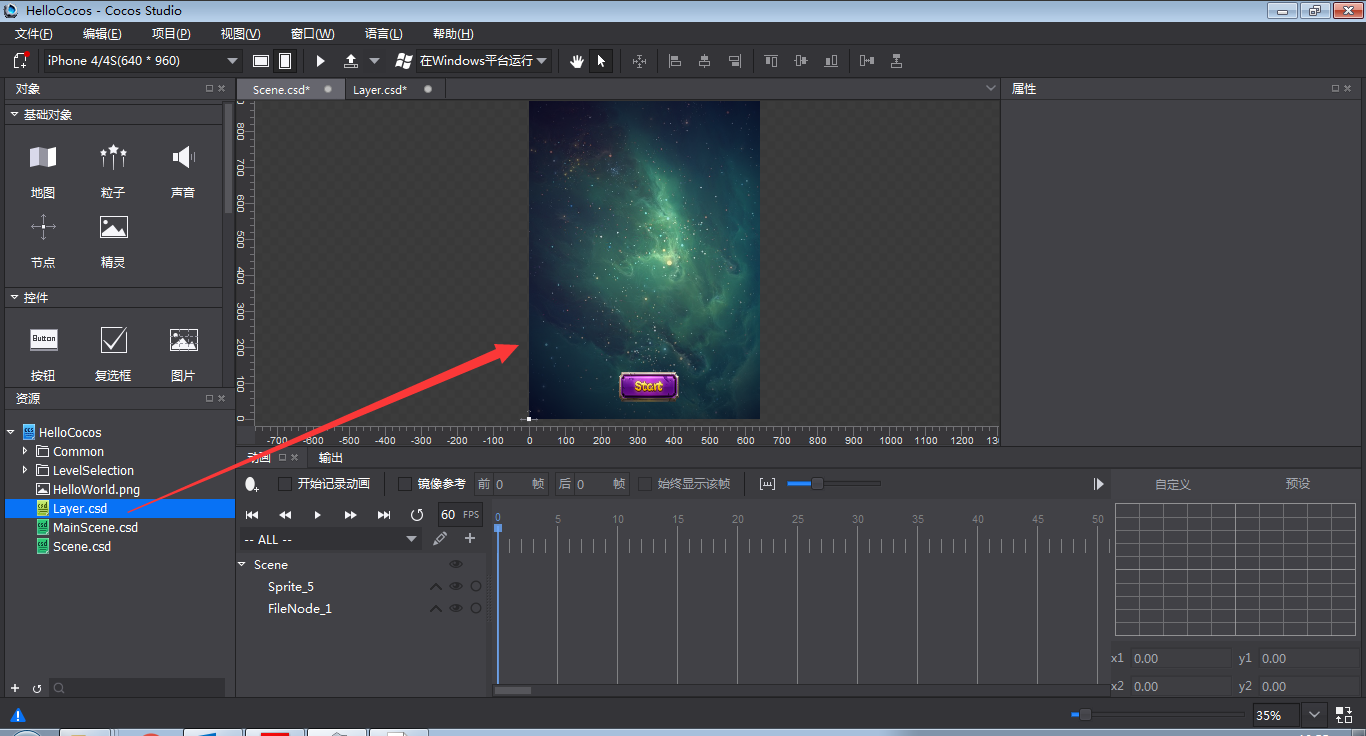
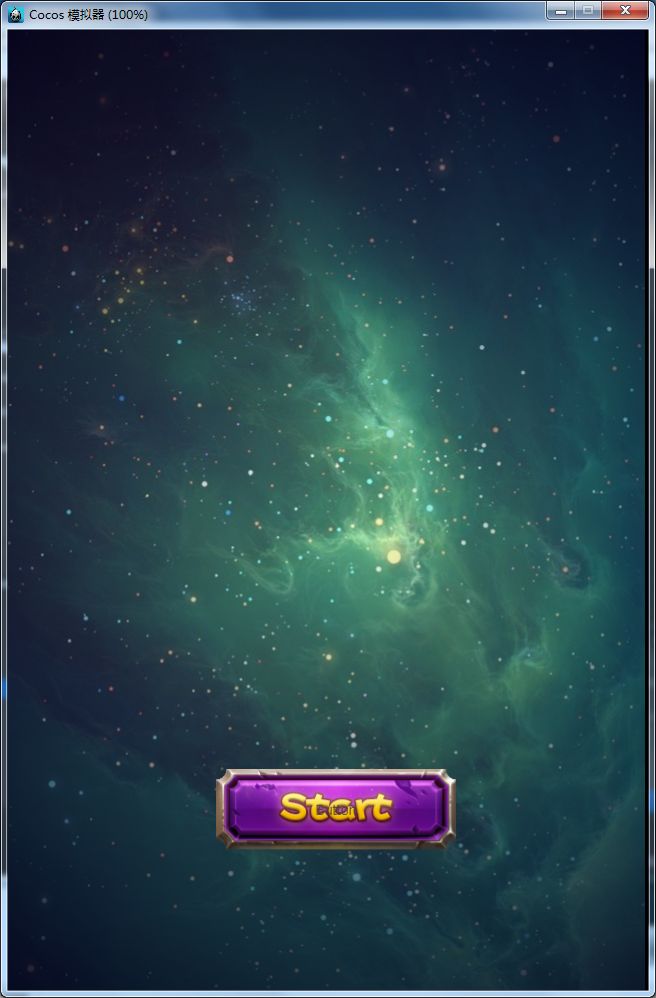
4 Click “Preview” button  at the top of the workspace to check the visual effects of the layer.
扫描二维码或在微信中搜索 KeepMovingXin